Pages

5.06.2011

Some Spring Gardening

Today was a big day for Miss Moira.  She learned how to plant seeds.

It all started because I thought she would enjoy having a little garden of her own.  She loves to water plants and has a wonderful fixation on sticking her hands in the potted plants in my house and dumping dirt all over the floor.   She also loves picking dandelions, as well as the little white flowers off of my shamrock plant.  And she is a little bit of a nature girl.  Between 17 and 18 months she would walk around my mother's gardens and sniff the flowers.


When we went camping last Labor Day, she did this...


Yeah, she hugged a tree.  In the middle of the woods.  In nothing but a diaper.

Hippie?  Naturist?  Arborist?  Who knows.

What better way to foster Moira's green thumb than to help her grow her very own garden.  Maybe she'll stop picking the house plants and dumping dirt on the floor...I doubt it.


Today, she planted sunflower seeds, cucumbers, and green beans.  The sunflowers because I thought she would love to see how big they get; the cucumbers and beans because she loves them.  Once the risk of frost is gone here in Buffalo (hopefully sometime before July), we will transfer her plants to some large pots to put along our sunny fence.

She was thrilled to be outside (finally after days of rain) and to use her new gardening tools from the Easter Bunny (she especially loves having her own watering can).


First, put on the garden gloves...


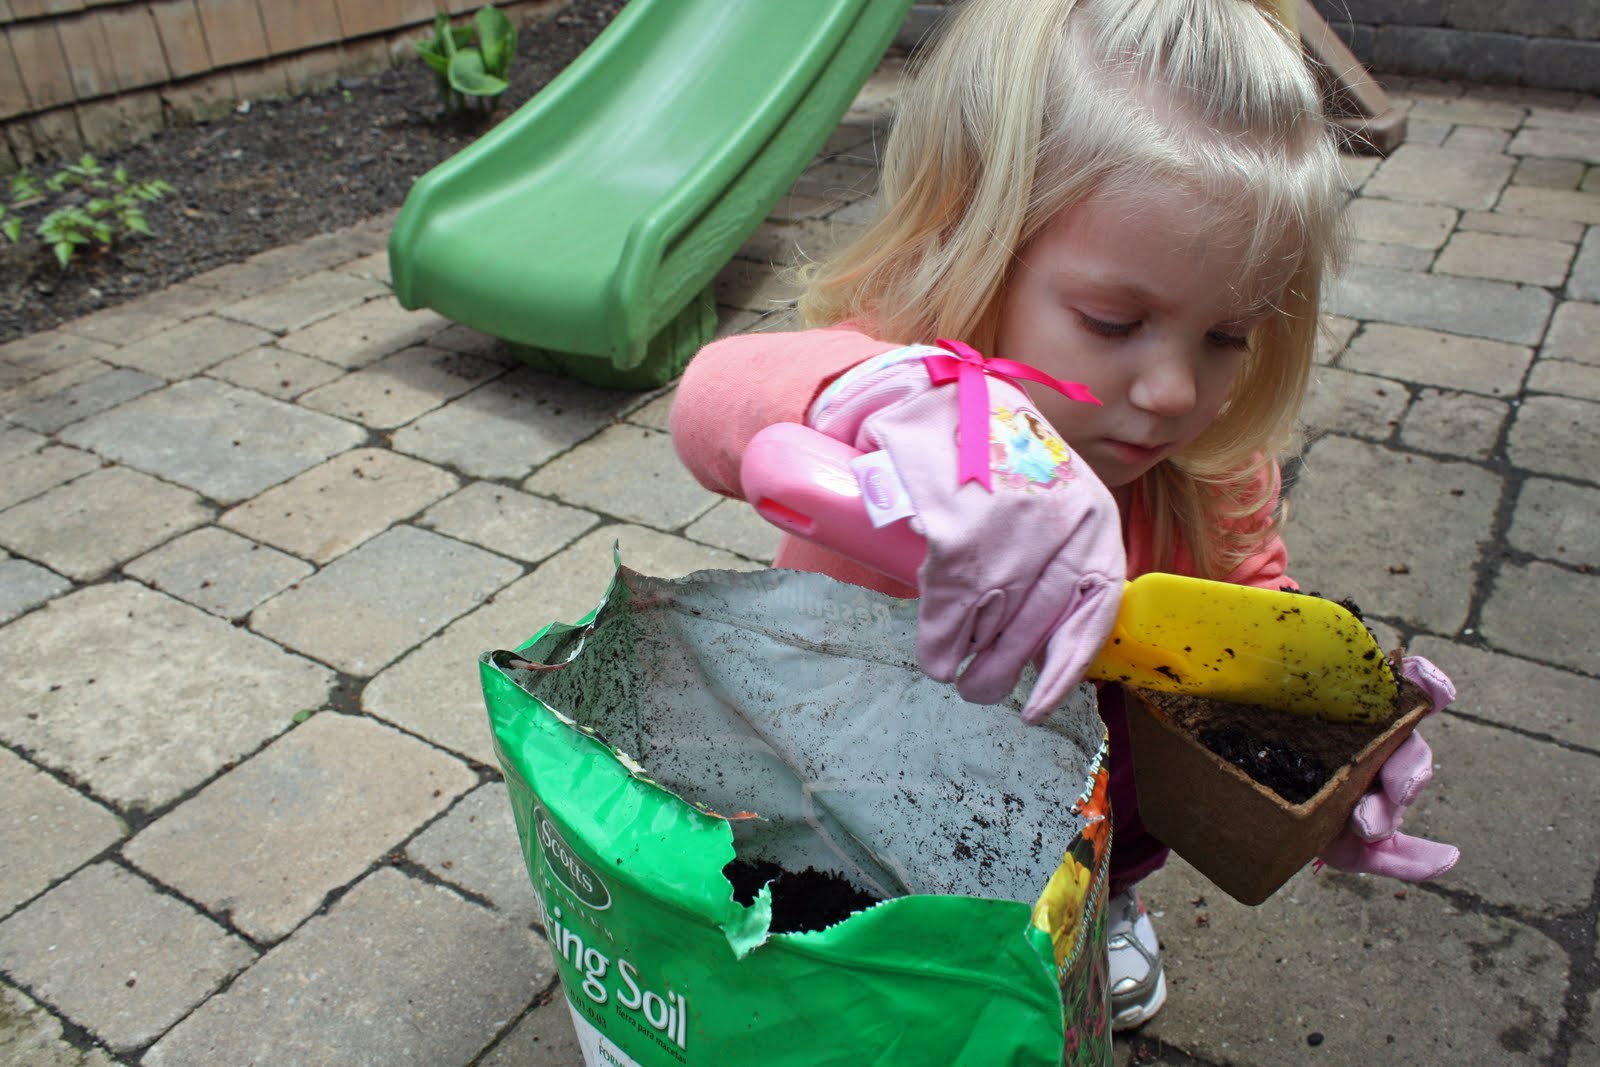
Open the soil...


Put the soil in the starter pots...


Repeat...


Get all of your seeds planted...


Cover the seeds with soil...


Put in your garden tags...


The last and best part:  water the seeds with your cool new watering can!


Admire your work...


And wait for those sprouts to come up!

:)
Anne

5.03.2011

Teacher Appreciation #2 and Lessons Learned in the Kitchen

Ever have one of those kitchen sessions in which you just seem to be completely off your game?  I had one of those yesterday.   Lucky for me, and my family, and Moira's teachers, everything worked out just fine, even if it did not work out smoothly (it doesn't help that I can an anxious, overly-dramatic, perfectionist).

I decided to use the Oreos left over from my pregnancy cravings to make Chocolate-Covered Oreo Pops for Moira's teachers for Teacher Appreciation Week.


They look good and a taste of non-pop-chocolate-covered-oreos tells me they taste good...but what a mess I made.  The sticks were too thick; the cream filling not wide enough; the cookies broke; the broken cookies fell in the chocolate...by the time I was done I had covered my fingers in chocolate and washed it off 10 separate times.

Lesson #1:  Next time you have a pregnancy craving for Oreo cookies...buy Double Stuff!

On to dinner.


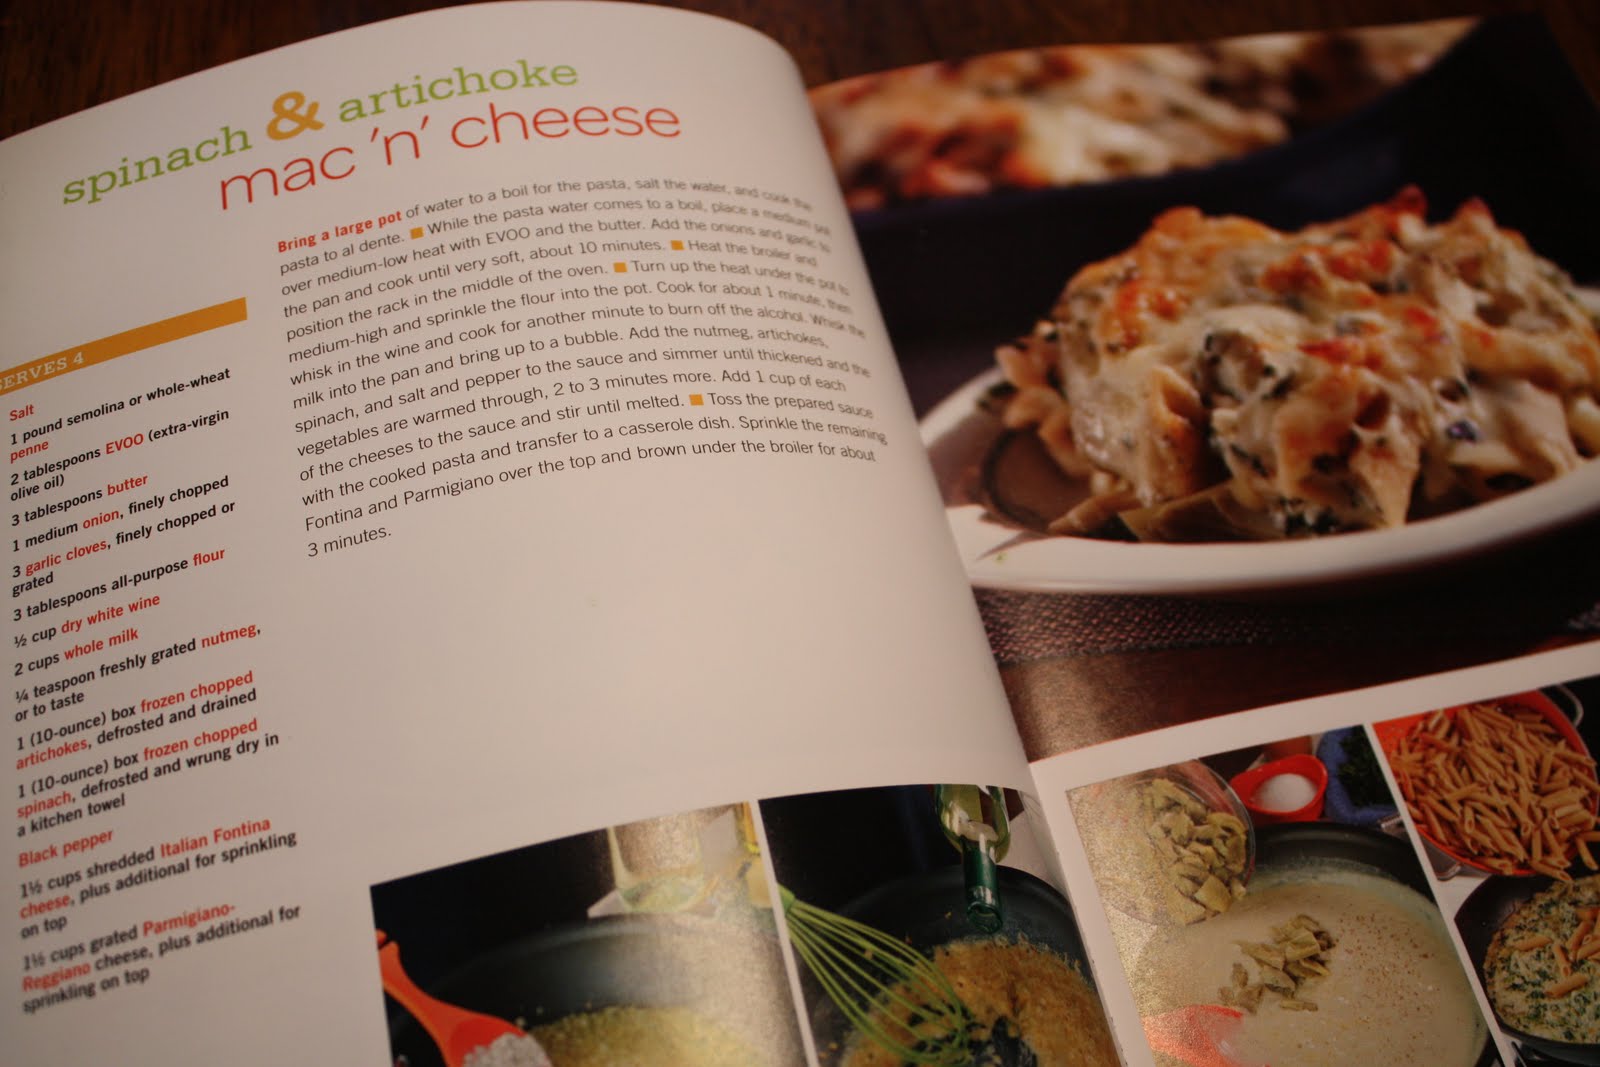
I tried a new recipe from my Rachael Ray's Look and Cook cookbook...Spinach and Artichoke Mac 'n' Cheese.  (Definitely not a diet food but perfect for Meatless Monday.)

Moira and I were out of the house most of the day and I did not unload the dishwasher or wash any of the dishes left in the sink.  This is something I am usually right on top of but I just didn't feel like doing it.  Well, I started cooking and quickly ran out of room on my counter and in my sink. Plus I had those Oreo Pops setting on the counter.  In the middle of preparing dinner, I decided I had to get my workspace cleared and started unloading the dishwasher and filled it back up, all the while trying to keep Moira from pulling out the dirty dishes from the washer...and laying in the middle of the kitchen floor as I cook...and dumping all of her play food and dishes all over the dining room floor...and taking a moment to get her set up on the potty (ahhh, potty training).  Needless to say, I burned my butter and had to start over and my dinner could have used more seasoning.  I was not fully into my cooking, that is for sure.

Lesson #2:  Take the (literally) 2 minutes it requires to clear off your counter and empty the sink.  It is not like you are cooking in Kitchen Stadium here!

Lesson #3:  Turn down the damn heat when you are melting butter!

Lesson #4:  Stop trying to do everything at once!

When all was said and done, dinner was good (and not too unhealthy because I served smaller portions and we had salad with it...yay for green veggies).  The treats came out just fine.  The Teacher Appreciation Gifts were what I was hoping for and received with much gratitude.


I think I need to relax!

:)
Anne

5.01.2011

Teacher Appreciation Week

This week is teacher appreciation week!  Although Moira is not in "preschool" yet, she has been attending daycare since she was 3 months old.  At that age the caregivers are not necessarily called "teachers", but I know that Moira is learning every time she is there...after all, our babies are little sponges!  In that spirit, I have taken to acknowledging the hours my daughter spends in the care of someone other than myself or my husband and showing our appreciation for all that they do.  (I know what it is like to spend hours with one two-year old...they have a room full of them!)

This year's small token of appreciation...cute little post-it note holders.


I made 8...one for each teacher in the room.


It was quite simple, with only a couple of supplies needed, and I am sure I will use this again down the road someday.

My post-its were 3"x3" and 100 sheets.  I cut a piece of paper 3" wide.  Moving along the length of the paper I scored at 3", 3 3/8", 6 3/8", 6 3/4", and cut at just a teensy-weensy bit over 8 inches (sorry, I didn't snap a photo of that part).


I glued the post-its to the back 3"x3" square.


To make the "enclosure", I put 3 dimensional stickers at where the top flap ended.


When I put my tag on top, it created a little notch-sort-of-thing to keep the holder closed.


Wrote a little note of thanks inside to finish it off.

Now, I am also in the custom of bringing some sort of "treat" to these fine ladies...I just haven't decided what it will be yet!

:)
Anne

craft

4.29.2011

Raspberry Oreo Brownies

It has been a long time since I have had brownies.  Considering the amount of sweets I have had in the past week (between birthdays and Easter) and taking into consideration the amount of candy I have left stashed in my cupboards, I really did not NEED to make brownies this afternoon...or did I?


I was inspired by the Brownies with Oreos I saw on Vanilla Sugar and set into action by my pregnancy cravings (I really don't know what I will do when I can't use that as an excuse anymore).  The result?  Yum!


I used a box of "family size" brownie mix, following the directions as they were on the box.


Chopped up about 10 Oreo cookies (had a sampling of one with Moira).


Stirred the chopped cookies in to the batter.


Thawed and mashed about 1 1/2 cups frozen raspberries.


Poured the batter in the pan and swirled the raspberries through it.  Baked for about 10 minutes longer than the instructions on the box recommended (about 38-40 minutes for a 9x13 pan).

In the words of Moira, "Ta-ta-da" (she likes to add syllables into her words lately...funny).


I like mine warm with a scoop of (less-fat slow-churned) vanilla ice cream.

Enjoy!
:)
Anne

4.24.2011

A Keeper!

To Whom It May Concern:

I am writing to you on behalf of Joy the Baker's Big Berry Birthday Cake and to give a shining recommendation for this home-baked treat.


I first heard of the Big Berry Birthday Cake while I was searching for a perfect scratch cake to make for my mother's birthday.  The requirements I had for the position were that it had fruit and it was from scratch.  After stumbling across this Cake, I knew it would be perfect for the job.  I completely underestimated the Cake's ability to execute the task it was chosen for.  Not only was it a breeze to make (no more difficult than a "box-cake" as we say in my household), the Cake had a perfect dense texture and wonderful vanilla flavor.

After reading other recommendations regarding the Cake, I decided I could not pass up the chance to also recruit its companion, Vanilla Whipped Buttercream Frosting with Rose Water, for the task at hand.  Again, I was not disappointed.  This Frosting proved to be so smooth, sweet but not-to-sugary, and had such a unique flavor of vanilla and rose water that no other candidate would have been able to live up to the job.

 
In conclusion, it is with great satisfaction and confidence that I recommend Big Berry Birthday Cake for any of your occasions in which an exceptional cake is desired.

Sincerely,
Anne

Other praise for Big Berry Birthday Cake:

"This is probably the best cake I've ever had."
-Justin, The Sister's Boyfriend

"I woke up thinking about this cake."
-Donna, The Birthday Girl

"It has a very complex flavor...It was a delicate dance of flavors on my tastebuds."
-Steve, The Husband

"Mmm...mmmmmm.....mmmmmmmmmmm."
-Stephanie, The Sister

4.22.2011

2 Pounds of Butter in 2 Days


I can go days, weeks, without baking.  All of a sudden something will come up and I am baking like a crazy lady.  This week:  Easter; my mother's birthday; my father's birthday; and an 'early' Easter at my in-laws (really, a 'look what the Easter Bunny brought for Moira' dinner...too cute).  What I did the past two days is absolutely crazy, considering I am 32 weeks pregnant. (I am feeling the aftermath of my craziness today...ouch!)  Besides my aching back and feet, the end result was 4 wonderful treats, ready for the celebrations and lots of butter.  Mmmmm, treats.  Mmmmm, butter.


I saw these Raspberry Lemonade Bars from Handle the Heat over at Pinterest and could not resist the urge to try them out. It just sounded like summer, and God knows we could use some summer in Buffalo, NY right now.  They are super-tangy and sweet, and chewy.  Different...but I can't stop sneaking a bite or crumb here and there, so we will say addicting in their own little way.

 
My father's birthday was earlier this week.  I made him peanut butter cookies, to be delivered during our visit.Nothing fancy, just classic, wonderful peanut butter crisscross cookies.  I used the recipe from a Chow Life which is pretty much the recipe I remember from my youth...lots of peanut butter, lots of butter, lots of sugar!  Who doesn't love dozens of cookies, all to themselves?


My mother is celebrating a big one this year (I won't disclose that information Mom, I promise).  I really wanted to make something wonderfully special but to my mother's taste.  She asked for something with fruit in it.  (PERFECT!!!  I have been craving fresh berries lately!)  I love reading Joy the Baker's blog and found her recipe for a Big Berry Birthday Cake with Vanilla Whipped Buttercream Frosting with Rose Water.    OH MY GOD!!!  The crumb of the cake I have tasted so far is amazing.  I am waiting to frost the cake until celebration day tomorrow, so I will have to share the fabulousness of the dessert after that.  Stay tuned!


Moira and I made the sugar cookie cut-outs for Easter.  She loves baking cookies and is super proud when she gets to tell people that she made the treats they are eating.  This sugar cookie is THE sugar cookie recipe I have been using for all of my holidays, specifically Christmas, for years.  I love it!  However, I have been on the search for a frosting that satisfies me.  I have settled for the past couple of years on a sugar frosting with just confectioners' sugar, vanilla, and milk....until yesterday when I decided for a change to try a plain old buttercream recipe.  The verdict?  This is it for us!

Here is our favorite Sugar-Cookie Cut-Out recipe.  I added some lemon zest and lemon extract for the spring occasion.

1/3 cup butter, softened
1/3 cup shortening
3/4 cup sugar
1 teaspoon baking powder
1 egg
1 teaspoon vanilla
2 cups all-purpose flour

Beat butter and shortening in a medium mixing bowl on medium speed until creamed.  Add sugar, baking powder and a dash of salt.  Beat until combined, scraping the sides of the bowl.  Beat in egg and vanilla until combined (I added 1 teaspoon lemon extract and 1 tablespoon lemon zest here).  Add the flour and mix until fully combined, using a wooden spoon if needed.  Cover dough and chill at least one hour until easy to handle.

Preheat oven to 375.  Roll one portion of the dough out at a time on a lightly floured surface to about 1/4 inch thickness.  Cut out your shapes and place on an ungreased cookie sheet.  Bake for 8 to 10 minutes until edges are firm.  Cool on the cookie sheet for 1 minute then remove to a wire rack to cool.

Buttercream Frosting

1/3 cup butter, softened
3 cups confectioners' sugar
1 teaspoon vanilla
(I also used 1/2 teaspoon lemon extract)
4 Tablespoons milk

Beat butter in a medium bowl with hand mixer until creamed.  Add sugar and mix.  Add vanilla (and lemon).  Gradually add milk until desired consistency is reached.

Frost your cookies and let them set for a couple of hours before stacking.  And, although it is tempting, try not to eat the frosting out of the bowl!

:)
Anne

4.18.2011

Maternity Shirt...sort of

 Last week was a busy one at the Circus Berry household, with hubby away on business then a visit from my mom (filled with lots of DIY talk and food).  I did manage to do some refashions during Moira's bedtime...a little here and a little there.  Here is one of the results...


A little background first...couple of weeks ago I went through my wardrobe to get rid of some stuff and ended up with the crazy idea to refashion some things instead of giving them to Goodwill.  The refashions have been going on since then, giving me 2 'new' articles of clothing so far (well, 3 but one is not included in this post).  These are what I will call my (enter air quotes) "maternity shirts".  I do intend on wearing them after baby arrives, hence the air quotes.

They are simply made from a top of one shirt, a bottom of another shirt (or nightgown, in the case of the other shirt I made in the same fashion...not pictured here).  Here is what I did:

Tried on my "top" and marked where I wanted it to end and cut across there.  (I also ended up cutting of  the sleeves and shaped the neckline a little differently).  I cut the "bottom" right under the arms (maternity here people...I need that extra fabric to cover up the ever-growing bump).

Sewed a basting stitch around the top of the "bottom" fabric.

Gathered the top of the "bottom".

With the right sides together, pinned the top to the bottom

Adjusted my gathers so the bottom side seam lined up with the top side seams and stitched the two together, 1/2 inch from the edge, using a zig-zag stitch.

Tore out my basting/gathering stitch.

 Suppose I could have stopped here, but noooooo.....

 Took the bottom remaining fabric of my "top".

Pinned the remaining fabric to my shirt, to cover up the seam and gathered/scrunched it up a bit.

 Hand-stitched some of the gathers in place a the side seams.

 Gotta keep those scrunches in place (very technical, I know)...

 And here I have a finished shirt...but wait...

Gathered the shoulders a bit...I love gathers.

 Took some strips of the "bottom" fabric (not the sleeves though...saving those for another day).

Stitched the ends together to make long strips.

Made some rosettes.  I also love rosettes. (GREAT rosette tutorial at Little Birdie Secrets if you are not sure how to make these cutsies).

Stitched the rosettes along the neckline...DONE!

Thank you Momma for the photography! And for not making me stand and pose for too long!

:)
Anne