Pages

4.18.2011

Maternity Shirt...sort of

 Last week was a busy one at the Circus Berry household, with hubby away on business then a visit from my mom (filled with lots of DIY talk and food).  I did manage to do some refashions during Moira's bedtime...a little here and a little there.  Here is one of the results...


A little background first...couple of weeks ago I went through my wardrobe to get rid of some stuff and ended up with the crazy idea to refashion some things instead of giving them to Goodwill.  The refashions have been going on since then, giving me 2 'new' articles of clothing so far (well, 3 but one is not included in this post).  These are what I will call my (enter air quotes) "maternity shirts".  I do intend on wearing them after baby arrives, hence the air quotes.

They are simply made from a top of one shirt, a bottom of another shirt (or nightgown, in the case of the other shirt I made in the same fashion...not pictured here).  Here is what I did:

Tried on my "top" and marked where I wanted it to end and cut across there.  (I also ended up cutting of  the sleeves and shaped the neckline a little differently).  I cut the "bottom" right under the arms (maternity here people...I need that extra fabric to cover up the ever-growing bump).

Sewed a basting stitch around the top of the "bottom" fabric.

Gathered the top of the "bottom".

With the right sides together, pinned the top to the bottom

Adjusted my gathers so the bottom side seam lined up with the top side seams and stitched the two together, 1/2 inch from the edge, using a zig-zag stitch.

Tore out my basting/gathering stitch.

 Suppose I could have stopped here, but noooooo.....

 Took the bottom remaining fabric of my "top".

Pinned the remaining fabric to my shirt, to cover up the seam and gathered/scrunched it up a bit.

 Hand-stitched some of the gathers in place a the side seams.

 Gotta keep those scrunches in place (very technical, I know)...

 And here I have a finished shirt...but wait...

Gathered the shoulders a bit...I love gathers.

 Took some strips of the "bottom" fabric (not the sleeves though...saving those for another day).

Stitched the ends together to make long strips.

Made some rosettes.  I also love rosettes. (GREAT rosette tutorial at Little Birdie Secrets if you are not sure how to make these cutsies).

Stitched the rosettes along the neckline...DONE!

Thank you Momma for the photography! And for not making me stand and pose for too long!

:)
Anne

4.11.2011

Bunny Pretzel Pops

Happy Monday.  It finally feels like Spring these past couple of days and even though I am exhausted, it puts a little bit of pep into my step.  It is a windy day today (I am reminded of "Pooh's Blustery Day"...we have seen that movie quite often), but we still went outside, walked a couple of blocks, and played on the slide.  It was just good to be out of the house.  

Also made these today with Moira.  Salty & sweet...mmmm


And they are covered in coconut...double mmmm

Here is what you need:

We used mini chocolate chips, white chips, pretzel rods, 'regular-sized' marshmallows, and flaked coconut.  Most of it probably looks self-explanatory, but here is what to do:

Get your little work station set up...white chocolate chips melted; mini-chips ready; coconut in a shallow dish; marshmallow ears (by the way, the marshmallows were cut down the long way, then each 'slice' was cut in the middle to make 2 half-circles); pretzel rods; and wax paper for the finished product.

Dip the pretzel rod in the melted white chocolate chips.

Immediately roll it in the coconut.

Put the mini-chip eyes and nose on.  Use some of the melted chocolate as glue if needed.
(Moira is in the, "NO, I do it" phase so things got a little messy.)


Use some of the melted chocolate to put on the bunny ears.


Sneak a pretzel rod, and when someone asks you what you are doing, tell them "I'm eating a pretzel!" in your best matter-of-fact voice.

Enjoy your treat (after you eat your dinner, of course!)

And if you have left-over marshmallows and melted chocolate, make these little fellas...roll your marshmallow in melted white chocolate chips, roll it in coconut, and add some bunny, eyes, and nose (using some of that melted stuff for your glue).

:)
Anne

craft

4.08.2011

Easter Hand-Print Painting

If I had to pick one of Moira's MOST favorite things to do, it would be painting.  I say, "We are going to paint a picture" and she practically starts spinning in circles with excitement.

Today we made a hand-print painting of an Easter egg hunt.


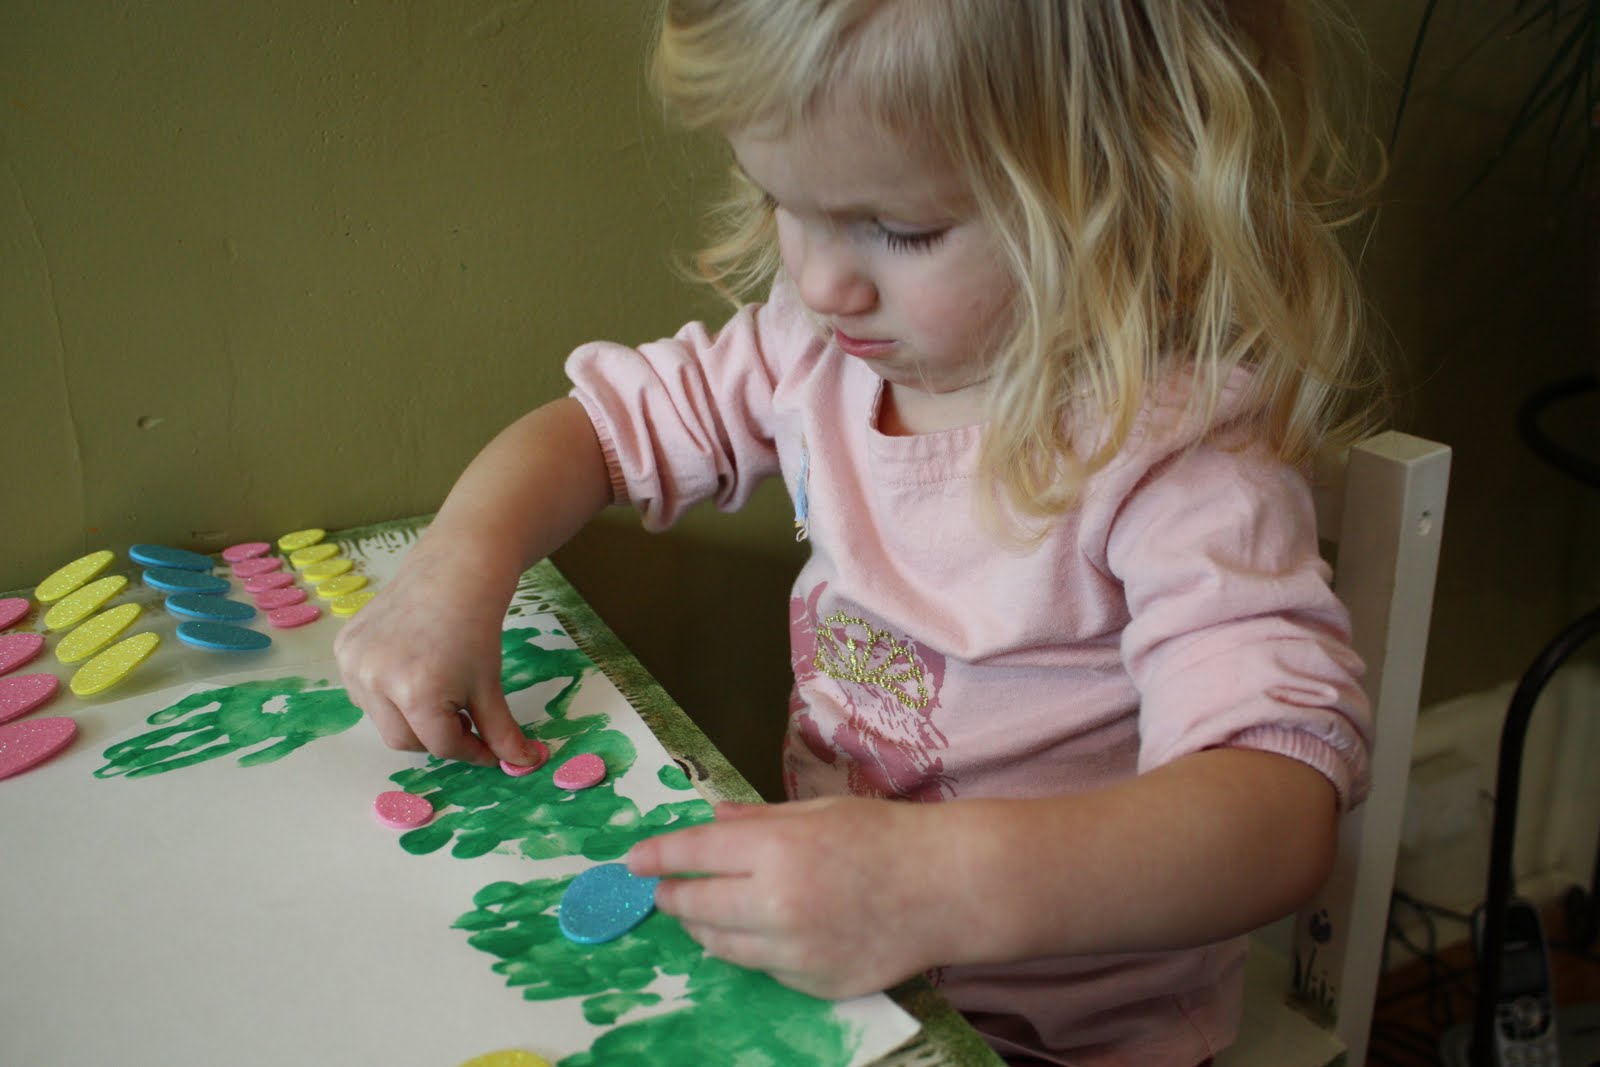
With a little bit of green paint, a blank sheet of paper, and...wait, it gets better...glitter egg stickers...we have a real masterpiece.


Moira's hand-prints made the grass.


We have done finger paints before, but...


we are still a little unsure about the feeling of cold, slimy, green paint on the hands at first...


Oh boy.


Now we're getting it...


Oooo, green paint on the hands...


Of course we did a couple of extra pages of fun!


Once dry, we added the stickers.


And the SLP mommy could not resist the urge to enter some concept instruction in there.


On top of the grass, on the bottom of the grass...


Big egg, little egg...


Blue, pink, yellow...you get the idea.


And the best part...showing Daddy her art when he got home.  If only I had the camera ready to capture the pride on this little girl's face at that very moment.  Priceless.

:)
Anne

Join  us Saturdays at tatertotsandjello.com for the weekend wrap 
 up           party!